
We try out the new Prumihimo disk from Pru McRae
Pru McRae was one of our favourite designers at Beads & Beyond magazine - we could always rely on her to come up with new and innovative ways to incorporate beads into her designs as well as creating some beautifully wearable jewellery.When Pru got in touch last month to tell me about the launch of her new 'Prumihimo disk', I was quick to hint that I'd love to give it a test run ;-) Well, I was lucky enough to receive a little parcel within days containing a disk, hot off the press and a link to a YouTube tutorial to get me started.
It's all in the preparation!
I couldn't wait to have a go so first watched the quickstart tutorial Pru suggested so I could see exactly what I was dealing with.
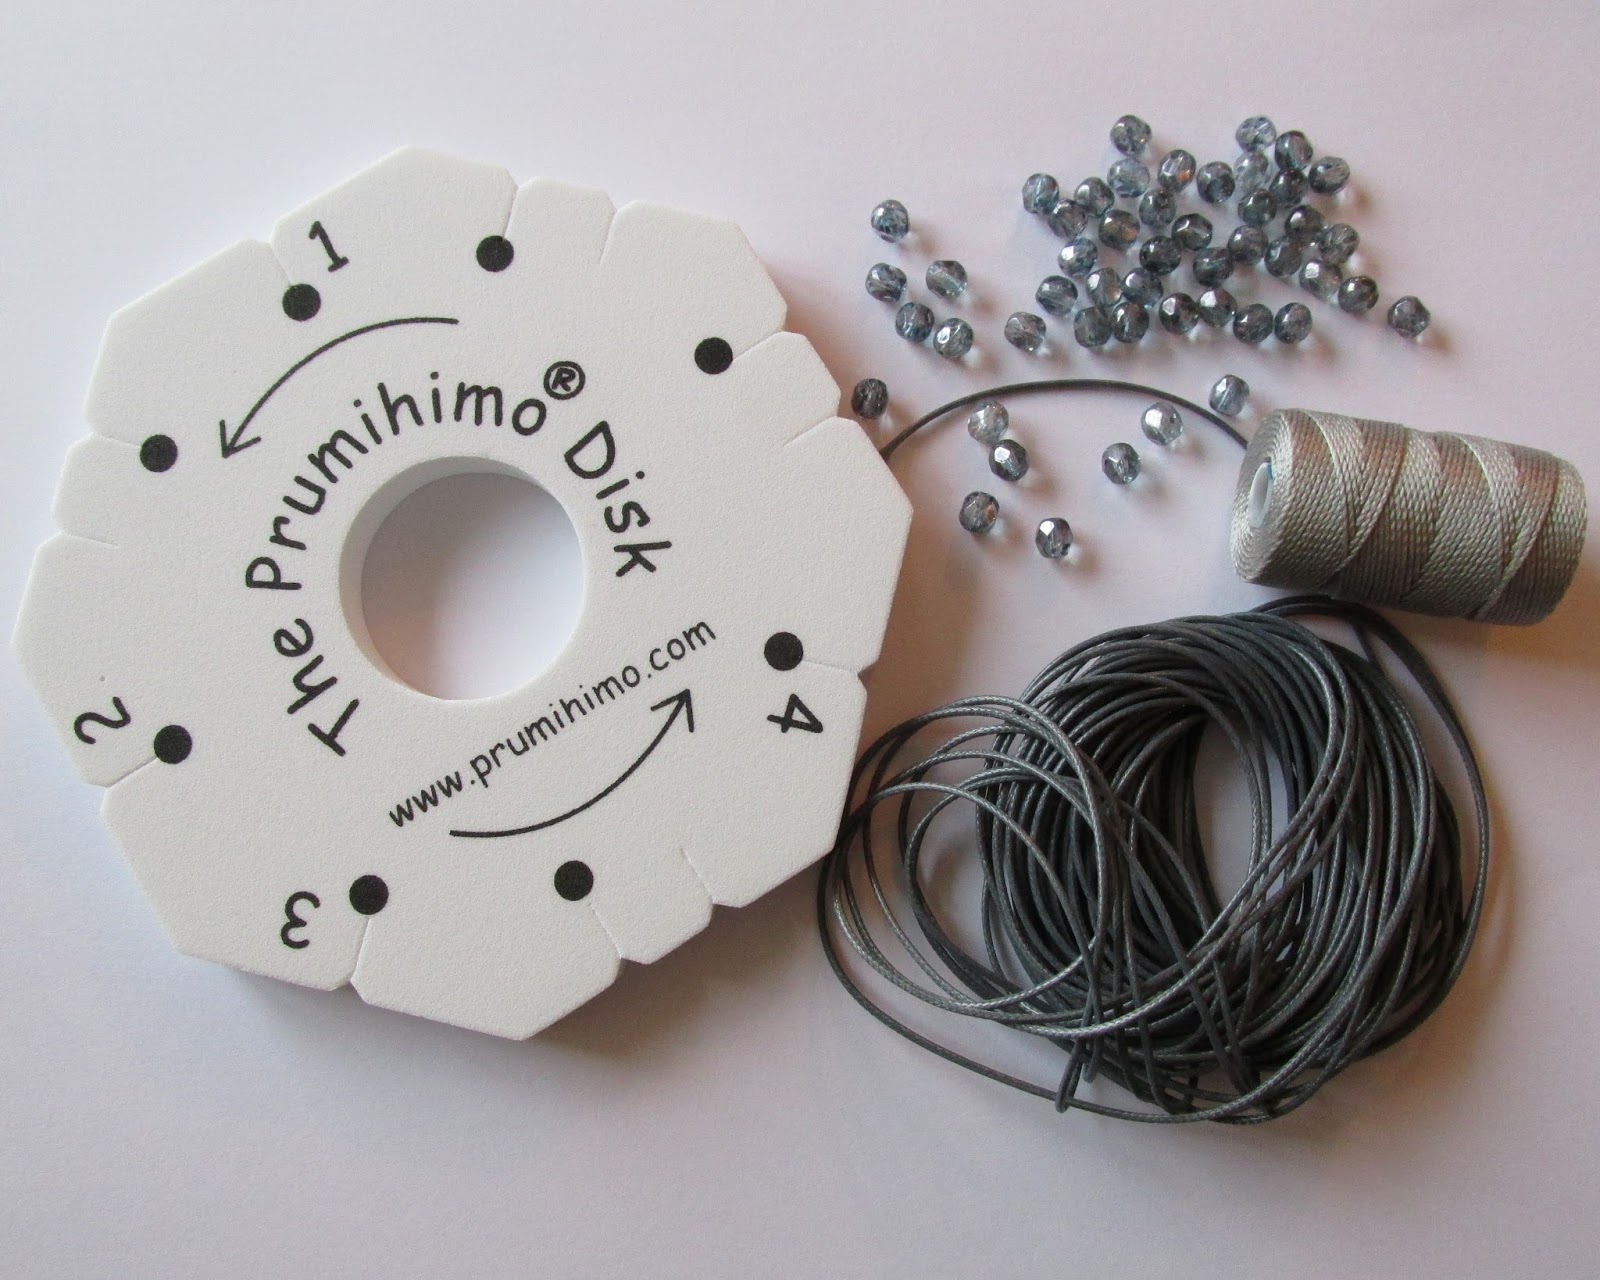
After a couple of viewings of the instructional video (it explains both plain and beaded braid), I delved into my stash and found some Shamballa cord in silver grey and some toning macramé cord that I thought would work along with some really pretty blue lustre fire-polished rounds (6mm) that I felt complemented the grey perfectly. I wasn't sure if my choices would turn out to be okay but dived straight in anyway!
Pru told us a little about the unique design of her disk with its unusual slots and markings:
"The braid is a traditional kumihimo braid, which I have adapted for use on this new disk. The great benefit of this braid is that the structure does not spiral, which allows more precise placement of the beads than is possible with the basic Round Braid. Beautiful braids can be made with beads along 1, 2, 3 or 4 sides, with no twisting or distortion. Fewer beads are used, which makes the braids economical and very quick to make up. All sorts of unusual bead shapes can be used, so the potential for experimentation is only limited by your imagination. This disk will open up a whole new world of creativity for all braiders!"
 Getting set up
I cut two 2m lengths of each cord and folded them in half at the centre, securing with a scrap of cord before pushing the centres through the hole in the disk. I then set up the thin and thick cords according to Pru's video, with the Shamballa cord in slot 1 and the opposite slot, slot 2 and the slot oppostie and the macramé cord in slot 3 and opposite and slot 4 and opposite. At this point, all the slots with dots are occupied. This is the starting pattern.I then threaded on the fire-polished beads onto the cords at 3 and opposite. I added around 25 beads to each cord and knotted the ends secure them.
Mastering the braid
I decided to braid a little without beads first to get the hang of the move sequence. Starting with the cord at number 1, I moved it to the empty slot opposite. I then moved the cord from the slot opposite 1 (with the dot) up to the empty slot just vacated in the first move. I then swapped the cord from the slot without the dot to the one with the dot right next door. I then turned the disk anti-clockwise until number 2 was at the top, repeating the same sequence as before with the number 2 cord, and ending up with all cords back in slots with dots. Turn the disk anti-clockwise again so number 3 is at the top and move the cords as before (except this time the empty slot is on the left instead of the right of the cord in the dot slot!). Turn the disk anti-clockwise again so number 4 is at the top and repeat the moves.
NOTE: It will feel a little strange at first and difficult to build up a rhythm as you don't always turn the disk by the same amount as you would in a normal Round Braid. However, follow the arrows and the numbers carefully and you won't go wrong!
 The fun bit!

Once you've mastered the plain braid, you can start to add beads. Each time you move a cord at number 3 slot (or opposite), you add in a bead. Keep your thumb on them to stop them moving as you continue to braid. Once you've done the next two moves at 4 and 1 again, the beads are secure. I quickly realised that my 6mm fire-polished beads were a little on the large side so added in a plain braid sequence between each beaded one to space out the beads a little more. Ensure you lay the cords down each time so that the two beads are sitting one each side of the braid. It gets easier to see when the beaded braid gets a little longer.
Keep going, adding in beads each time you move the thin cords with beads on until your bracelet is the right length. If you haven't added enough beads to the cords, just cut off the knot and thread on more!
The finished braid
Here's my finished bracelet. I didn't have any kumihimo end caps to hand, so have fastened it with a macramé sliding knot for now. I will probably add some smaller fire-polished rounds to the cord ends too when I locate some the same colour.

Experiment a little!
The bracelet was a simple design with the same beads above and below the braid. I then experimented a little with some Czech daggers and smaller fire-polished crystal beads. To get this pattern of a dagger (A) below and a round (B) above you need to thread up your cord at number 3 as follows: 1A, 1B, 1A, 1B.. and the cord opposite 3 in the same pattern but starting with 1B. As you braid, you'll build the pattern of beads shown.
 Where to get your own Prumihimo disk

Feeling inspired to have a go yourself? Pru is selling the disk as a package together with detailed written instructions, a short video as well as a full tutorial for a gorgeous necklace design 'Pipalicious' which uses Pip beads and seed beads. She has lots more tutorials lined up too!
The cost of the package is £10 (Paypal will convert to other currencies) and P&P is kept to a minimum with instructions being emailed upon purchase.
I thoroughly recommend the 'Prumihimo disk' and also suggest that you follow Pru's Blog at www.prumihimo.com
Happy creating!

Very pretty. I love it. I have already purchased Pru's Prumihimo disc.
ReplyDelete