Showing posts with label bracelet. Show all posts

Wednesday, 16 November 2016

Book review - Button Lover's Jewelry from Leisure Arts

I have bought and reviewed many of the Leisure Arts booklets over the years and when I found this one, I was keen to get my hands on it!


This publisher specialises in craft techniques and you can choose from a variety of titles covering everything from crochet to quilting. Many contain projects written by a single designer whilst others (like this one) are a collection of tutorials from several designers.

This is classed as a booklet rather than a book as at 32 pages, it is quite thin! However, packed into the pages are 16 different projects to make from rings to earrings, bracelets and necklaces.

The first page is a visual reference to the tutorials (as is usual in these booklets) and is a quick indication of the variety of designs and styles you can choose from.


One of the first projects to catch my eye was a denim cuff that uses buttons to both fasten and embellish. I love to find designs that allow me to combine different crafting mediums and also opportunities to recycle and re-use materials. I am not accomplished at sewing but I do like to incorporate fabric into jewellery as it is a wonderful source of texture and is so comfortable to wear.  
There are several projects in this booklet that require a small amount of sewing or that add ribbon to the mix.


Looking through the designs included in this collection, I started to think about how easy the projects are (and how inexpensive to make!). I think this book would make a lovely gift for a novice jewellery maker (I know my thirteen year old niece would love it!), especially if you included a bag of beautiful buttons to get them started.

Just look how easy this sparkly button bracelet is!


By the time I reached the last pages of the booklet, I was already planning my own button bracelet. I knew I had some of the pewter coloured buttons used in this design that also uses leather thong for a rustic look. 


When I looked in my stash, I found a range of metallic buttons that I remember buying from Totally Beads at the Hobbycrafts show a few years ago. However, I also found some rather lovely vintage beads that I'd forgotten all about. I bought them in a charity shop (always check the button basket in your local thrift stores!) a long time ago just because they were so pretty. Teamed with some brown toned simple buttons, I love how my design turned out!


Button Lover's Jewelry is published by LeisureArts and is priced at just £5.99 (that's less than 40p a project!). It's available to buy from GMC Publications.


Saturday, 18 June 2016

Book reviews - Beach Chic Jewelry and Earthy Boho Jewelry by Holly Witt-Allen

We love the series of jewellery making booklets produced by Leisure Arts. They may be just 32 pages but each one has plenty of project ideas that are both accessible and wearable.


Beach Chic Jewelry and Earthy Boho Jewelry are the perfect additions to your beading library at this time of year. With summer (hopefully!) hotting up and many of us planning beach holidays and festival fun, these two books from Holly Witt-Allen are sure to get you making the ideal accessories to your outfits.


Each book has a quick and easy reference at the beginning with a photograph of each project and a page number. I love that all the pieces together form a cohesive collection of jewellery with beautiful colour palettes and a distinct style that permeates through all the designs.


All the pieces in both books can be made with simple stringing, linking and knotting techniques and all the skills you will need are covered in the General Instructions sections at the back of each booklet. This means that both are the perfect choice for beginners or those makers who just struggle for ideas on materials or colour combinations.


Choose from necklaces, bracelets and earrings (left two from Beach Chic Jewelry, right two from Earthy Boho Jewelry)

You can choose to follow the instructions to the letter and use the same supplies as the designer. There is a list of those supplying beads for the designs right at the back of the book and I am sure you could locate the exact same components if you wanted. However, the great thing about the designs in these books is that you can easily adapt them to work with beads and materials you already have in your stash. 
Here are two gorgeous bracelets I made using materials I already had to hand, inspired by the 'Splash of Color Bracelet' and 'Relics Bracelet'. The instructions were really easy to follow and I just picked out beads in similar colours and took inspiration from the relaxed style.


I would definitely recommend these two booklets to newcomers to jewellery making and also for those looking for colour ideas and ways to make more layered and textural pieces. They would make a great and inexpensive addition to your bookshelf.


Beach Chic Jewelry is available from Amazon, priced at £5.99
ISBN 978-1-4647-3525-7

Earthy Boho Jewelry is available from Amazon, priced at £5.99
ISBN 978-1-4647-3524-0

Wednesday, 23 March 2016

Book Review - Fanciful Findings by Holly Witt-Allen

This is more a booklet than a book, but it is still 32 pages full of ideas and inspiration for using unusual objects in your jewellery pieces. In all, there are 22 projects for designs ranging from standalone bracelets to matching necklaces and earrings, all using recycled/upcycled components, or materials that look like they are!


Those who like to take a mixed media approach to jewellery making will love the techniques used in this book. 
Corks, clocks and cogs
You will have opportunities to use rubber stamps, découpage and dimensional finishes in some of the pieces alongside more conventional knotting and linking techniques. Whilst some projects will require you to search out unusual components such as hex nuts or hinges, others can be made using items you’d easily find at home including ring pulls from fizzy drink cans, bottle tops and corks. 


Stamps and sweetie tins
In addition to these ‘found objects’, you’ll also find ideas for using pseudo second-hand components often found online at scrapbooking and papercraft suppliers. Tim Holtz Ideology® range is a particular collection that springs to mind. With the addition of metal patinas, paint or paper, Holly will show you how to transform run-of-the-mill supplies into unique components and quirky designs. I particularly like the necklaces made from sweetie tins and simple stamping techniques.

The projects are beautifully photographed and the instructions have accompanying images to make them as clear as possible. You’ll also find a reference at the back of the book, explaining all the jewellery techniques required which helps to keep the project instructions as uncluttered as possible.

My only slight criticism of this book is that the materials lists for projects are rather long — you could find yourself searching for a while for some of the specific components. However, try substituting some of the supplies with similar products you have in your stash for a similar overall effect and don’t be afraid to mix ideas from different projects to suit the supplies you already have to hand.


Here’s a variation on the cork bracelet I made using a Prosecco cork and a Rioja cork from the collection I keep in a pot (they come in handy for all sorts of things!). The 'Leap' connector is made using a J-Lynn Jewels decoupage disc. The watch faces are from a job lot I bought on Ebay a while ago, simply stuck to cork slices. The pretend typewriter keys are made using clock charms with domed stickers adhered to them (the stickers came from Home Bargains discount store!). The cogs are from Big Bead Little Bead and the verdigris patina padlock charm and donut bead are from the range of Greek Metal components at Smitten Beads, as is the flower cog bead.  I don't remember where I found the little keys or clasp but I'm sure you can find similar online. And btw - the secret to turning cork slices into connectors? Tiny brass picture loops which simply screw in!


We have a copy of this book to give away


To enter into the draw to win, simply comment on this post and tell us the most unusual component or technique you’ve used in a jewellery piece. Look out on our Facebook page for a second chance to comment and win!

We will pick a winner at random on Monday 4th April after midday and announce on our Facebook page.


Fanciful Findings is published by Leisure Arts Inc. and is available from Amazon, priced at £7.00

ISBN 978-1-4647-3352-9


Monday, 22 February 2016

Kit Review - Haryana Bracelet

We tested this bracelet kit from Spellbound Bead Co that uses nothing more than simple square stitch


Buy yours here
The Haryana Bracelet kit is available in three colourways. Eastern Jewel is based on a design that appeared in Beads & Beyond a few years ago and is a bright and colourful choice. The less bold amongst you might prefer the Black/Gunmetal/Silver option or Autumn which is the kit I am testing here. The kits are all priced at £12.95.


The kit comes with a detailed booklet containing all the instructions, diagrams and a list of materials and tools. A needle and coordinating thread is also included. You'll just need scissors, a bead mat and a touch of glue or clear nail polish to seal any knots.


Before I start a kit from Spellbound, I always read through the instructions and then tip out a small amount of each bead type onto my mat. Don't tip out all the beads as you may forget which one is which. The bags are clearly labelled!


When following a bead pattern like this one, I find it helpful to number the rows. Bear in mind that the instructions are the same whichever colourway you choose. This means that yellow on the pattern grid may not actually correlate to yellow in your pack. I found it helpful here to letter each of the beads. A'G' indicates that the yellow bead is actually green in my design.


You'll complete all the blocks of beadwork first in this design. The number of blocks you need will depend on the size of bracelet you want. The instructions tell you how many blocks to stitch for what length of bracelet, allowing for the beading between the blocks and the clasp. I needed seven blocks in total.


Once you've completed the blocks, you link them together with strands of beads using a long length of beading thread. It pays to condition your thread for this bit as it can be quite a tangle if you aren't careful. I chose to finish the threads on the blocks and trim them before I started this bit as they kept getting in the way. 

All that's left after that is to add a sliding clasp which is simply stitched to the beadwork blocks at each end.


This kit is rated a 6/10 on Spellbound's difficulty scale but I think most beginner beaders could master it. The Delica beads are very small so work in good light and use a magnifying lamp if necessary.


Tuesday, 29 December 2015

Beaded braids made easy with Prumihimo!

We try out the new Prumihimo disk from Pru McRae

Pru McRae was one of our favourite designers at Beads & Beyond magazine - we could always rely on her to come up with new and innovative ways to incorporate beads into her designs as well as creating some beautifully wearable jewellery.

When Pru got in touch last month to tell me about the launch of her new 'Prumihimo disk', I was quick to hint that I'd love to give it a test run ;-) Well, I was lucky enough to receive a little parcel within days containing a disk, hot off the press and a link to a YouTube tutorial to get me started. 

It's all in the preparation!


I was intrigued by the design of the disk as the usual numbered slots were replaced with just 12, seemingly randomly distributed slots around the disk, some marked with a black dot, some not.


I couldn't wait to have a go so first watched the quickstart tutorial Pru suggested so I could see exactly what I was dealing with.

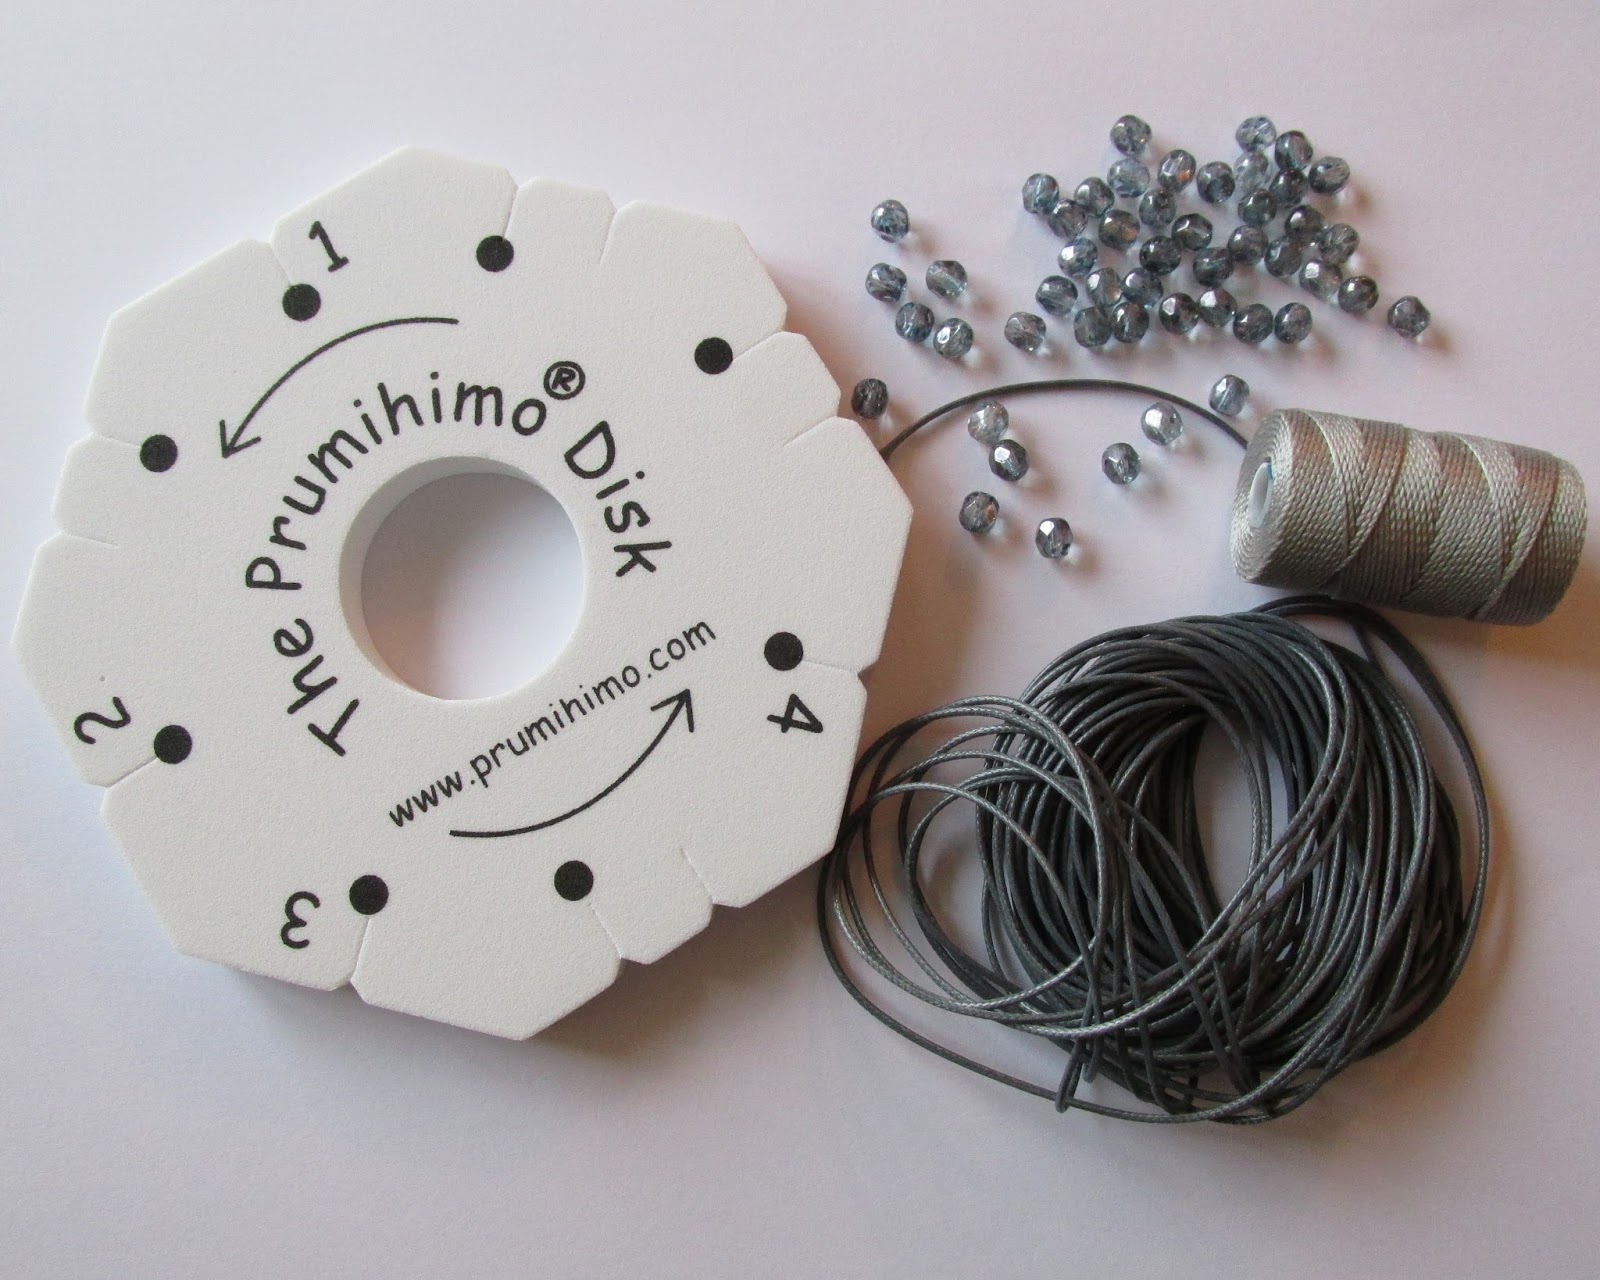
After a couple of viewings of the instructional video (it explains both plain and beaded braid), I delved into my stash and found some Shamballa cord in silver grey and some toning macramé cord that I thought would work along with some really pretty blue lustre fire-polished rounds (6mm) that I felt complemented the grey perfectly. I wasn't sure if my choices would turn out to be okay but dived straight in anyway!


Pru told us a little about the unique design of her disk with its unusual slots and markings:

"The braid is a traditional kumihimo braid, which I have adapted for use on this new disk. The great benefit of this braid is that the structure does not spiral, which allows more precise placement of the beads than is possible with the basic Round Braid. Beautiful braids can be made with beads along 1, 2, 3 or 4 sides, with no twisting or distortion. Fewer beads are used, which makes the braids economical and very quick to make up. All sorts of unusual bead shapes can be used, so the potential for experimentation is only limited by your imagination. This disk will open up a whole new world of creativity for all braiders!"

Getting set up

I cut two 2m lengths of each cord and folded them in half at the centre, securing with a scrap of cord before pushing the centres through the hole in the disk. I then set up the thin and thick cords according to Pru's video, with the Shamballa cord in slot 1 and the opposite slot, slot 2 and the slot oppostie and the macramé cord in slot 3 and opposite and slot 4 and opposite. At this point, all the slots with dots are occupied. This is the starting pattern.I then threaded on the fire-polished beads onto the cords at 3 and opposite. I added around 25 beads to each cord and knotted the ends secure them.


Mastering the braid

I decided to braid a little without beads first to get the hang of the move sequence. Starting with the cord at number 1, I moved it to the empty slot opposite. I then moved the cord from the slot opposite 1 (with the dot) up to the empty slot just vacated in the first move. I then swapped the cord from the slot without the dot to the one with the dot right next door. I then turned the disk anti-clockwise until number 2 was at the top, repeating the same sequence as before with the number 2 cord, and ending up with all cords back in slots with dots. Turn the disk anti-clockwise again so number 3 is at the top and move the cords as before (except this time the empty slot is on the left instead of the right of the cord in the dot slot!). Turn the disk anti-clockwise again so number 4 is at the top and repeat the moves.

NOTE: It will feel a little strange at first and difficult to build up a rhythm as you don't always turn the disk by the same amount as you would in a normal Round Braid. However, follow the arrows and the numbers carefully and you won't go wrong!

The fun bit!


Once you've mastered the plain braid, you can start to add beads. Each time you move a cord at number 3 slot (or opposite), you add in a bead. Keep your thumb on them to stop them moving as you continue to braid. Once you've done the next two moves at 4 and 1 again, the beads are secure. I quickly realised that my 6mm fire-polished beads were a little on the large side so added in a plain braid sequence between each beaded one to space out the beads a little more. Ensure you lay the cords down each time so that the two beads are sitting one each side of the braid. It gets easier to see when the beaded braid gets a little longer.

Keep going, adding in beads each time you move the thin cords with beads on until your bracelet is the right length. If you haven't added enough beads to the cords, just cut off the knot and thread on more!

The finished braid

Here's my finished bracelet. I didn't have any kumihimo end caps to hand, so have fastened it with a macramé sliding knot for now. I will probably add some smaller fire-polished rounds to the cord ends too when I locate some the same colour.


Experiment a little!

The bracelet was a simple design with the same beads above and below the braid. I then experimented a little with some Czech daggers and smaller fire-polished crystal beads. To get this pattern of a dagger (A) below and a round (B) above you need to thread up your cord at number 3 as follows: 1A, 1B, 1A, 1B.. and the cord opposite 3 in the same pattern but starting with 1B. As you braid, you'll build the pattern of beads shown.

Where to get your own Prumihimo disk

Feeling inspired to have a go yourself? Pru is selling the disk as a package together with detailed written instructions, a short video as well as a full tutorial for a gorgeous necklace design 'Pipalicious' which uses Pip beads and seed beads. She has lots more tutorials lined up too!
The cost of the package is £10 (Paypal will convert to other currencies) and P&P is kept to a minimum with instructions being emailed upon purchase. 

I thoroughly recommend the 'Prumihimo disk' and also suggest that you follow Pru's Blog at www.prumihimo.com
Happy creating!