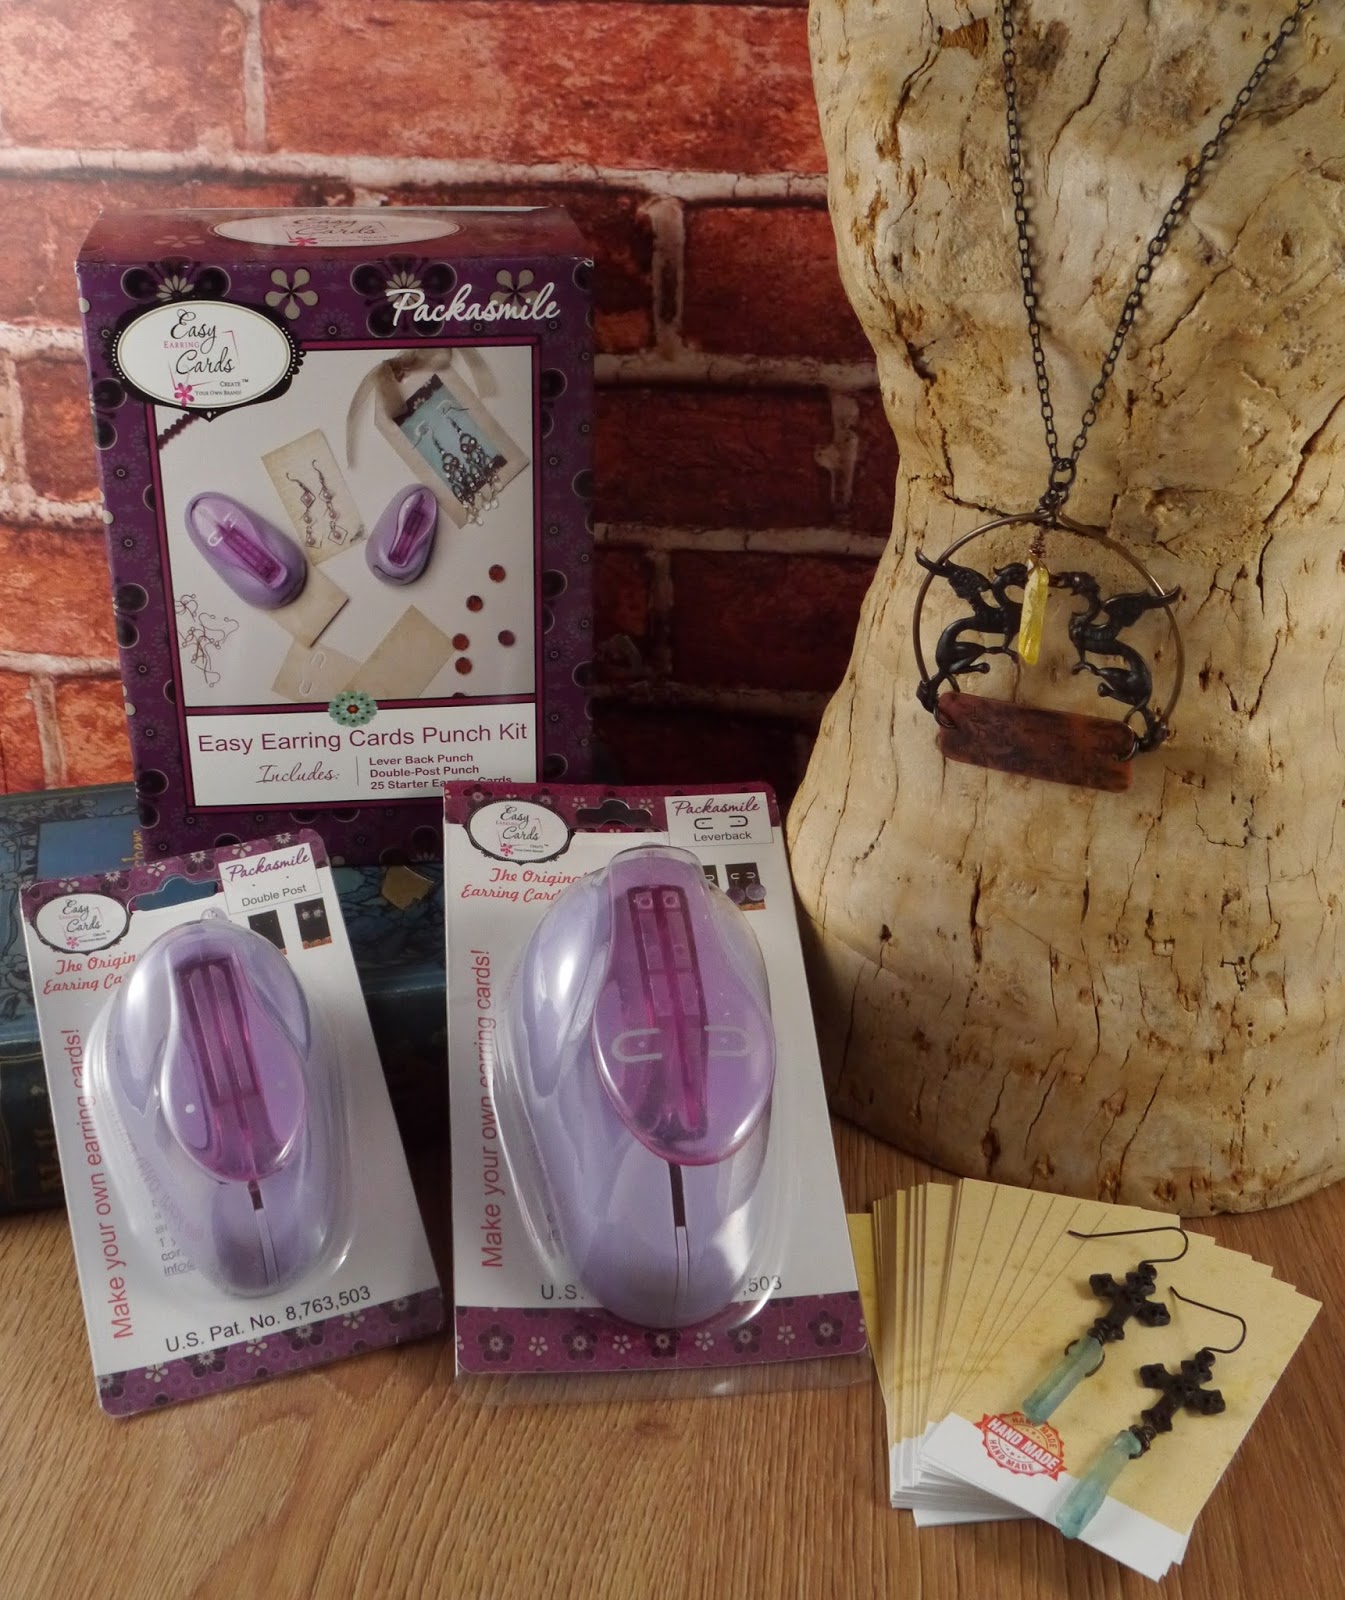
I was browsing a US
craft blog a couple of months ago when I first came across the Easy Earring
Cards – Punch Kit from Packasmile. Being a papercrafter, I have a wide
selection of design punches and could see just how useful one for earring cards
would be. I quickly got in touch with the lovely folks at Packasmile to find
out how I might get my hands on this innovative product.
So, the first thing I should tell you is that the Easy
Earring Cards range isn’t just about punches. The products available include card
blanks in various designs, some clever little card convertors that enable you
to hang your earring cards, and cello sleeves or unique ‘pouchelopes’ for
popping your cards into at craft fairs.
Putting the punch to the test!
The kit tested here includes two punches — the Leverback
Punch and the Double Post Punch. In addition are 25 Antique Tan Earring Card
Blanks.
The Leverback Punch is perfect for mounting earrings with
lever-back, kidney, fish-hook earwires. It can also be used to display pin
brooches. It punches approximately
3/4 inch from the edge of the card. The punched area is approximately 1
1/2 inches wide and approximately 1/4 inch in length.
The Double Post Punch is designed for use with stud
earrings, fish-hook earwires or even bobby pins! It punches approximately 3/4 inch
from the edge of the card and the holes are around 1 inch apart with a diameter
of 1/16 inch. Both can be used with pretty heavyweight
cardstock (around 100lb/270gsm for the Leverback Punch and 80lb/215gsm for the Double Post Punch). Both
can be sharpened using alumimium foil as with most paper punches. Oh and they
even come with a 1 year replacement warranty!

First impressions – the Double Post Punch
As soon as I opened my overseas package, I was struck by the
weight of the box. The two punches are lovely quality and heavy weight. The
Double Post Punch is the smaller of the two and both have a cover underneath to
catch the cut-out card. There is a mark on the plastic casing to show the
centre, and as long as you take note of this and make sure you push the card
blank in the right way around so it is nice and flat against the back plate,
punching is easy.
Here is my first attempt using the Double Post Punch on the
earring card blanks provided. BTW the
earrings are Carnelian ‘berries’ on autumnal leaf earring posts and are the
perfect length for these cards.
 First impressions – the Leverback Punch
The Leverback Punch creates a hole surrounded by a ‘flap’ of
card that you can thread your lever-back earrings through really easily. This
punch is slightly chunkier and I found it useful to make a pencil mark on the
punch casing where the edge of the card blank should sit when inserted. It
ensured the holes were centred and consistent. These earrings were a pair made for a 'Recipes for...' feature for Beads & Beyond magazine in May 2015.
Boost your brand with business card earring display
Once I’d mastered the use of the punches on the blanks
provided, I was ready to have a go with my own business cards. When I designed
my biz cards, I went for a vertical orientation specifically so that I could
also use them as earring cards. Up until now, I have used a ‘Crop A Dile’ punch
tool to make two holes in them for fish-hook earrings and studs.
For lever-back
findings, I have been using a small length of ribbon threaded through the holes
to attach the earrings. Quite a pretty solution but not the best way to display
the earrings as they would be worn.
One of the advantages of the Leverback Punch from Packasmile
is that the little tabs created can be bent forwards to better display your
earrings. Here are the cards I made using my business cards.
 My earring cards get the works!
The last few weeks, I have been coming up with new ways to
display my jewellery for a retail space. A visit to The Works website gave me
lots of inspiration including various tags with string cords, perfect
candidates to be punched as earring cards. These craft card shaped tags, simply
stamped with my logo are great for my earrings using Fallen Angel Brass
findings.
These lighter weight label tags are called Spring of the Farm. The cords are great for hanging the cards from
display hooks too.
The Works also had a huge range of Washi tapes, lace trims
and embellishments, oh and some cute pompom trim in blue and pink! I ordered
some white and brown craft luggage tags from Ebay to use with these for a
romantic, vintage style. These tag cards are just right for longer earrings
too!
The verdict
Overall, I am really impressed with the punches and will
definitely be using them with both luggage tags/labels and my own business
cards in the future. They are really well made and look like they will go the
distance. They will add a touch of professionalism too!
Getting hold of your own punches
The punches and complementary products are not currently
available in the UK but hopefully will be soon ;-)
For now, you can order the punches separately or as a kit from
www.easyearringcards.com. The
Double Post Punch is $19.99 and the Leverback punch is $21.99. You can buy the
kit with earring card blanks for $44.99. All products ship with USPS Priority
Mail.
Obviously, you will have to consider customs charges for
shipping these products into the UK.
Supplier details
The spring of the farm label tags, Lace Flower
Stickers, Lace Butterfly stickers, Craft Card Hang Tags, Pompom Trim in
blue/pink, Biscuit Crochet Lace Trim, Crochet Lace Trim, Brown and White
Crochet Lace Trim, Bronte Charm Washi Tape – www.theworks.co.uk
For more ideas: