Saturday, 18 June 2016

Book reviews - Beach Chic Jewelry and Earthy Boho Jewelry by Holly Witt-Allen

We love the series of jewellery making booklets produced by Leisure Arts. They may be just 32 pages but each one has plenty of project ideas that are both accessible and wearable.


Beach Chic Jewelry and Earthy Boho Jewelry are the perfect additions to your beading library at this time of year. With summer (hopefully!) hotting up and many of us planning beach holidays and festival fun, these two books from Holly Witt-Allen are sure to get you making the ideal accessories to your outfits.


Each book has a quick and easy reference at the beginning with a photograph of each project and a page number. I love that all the pieces together form a cohesive collection of jewellery with beautiful colour palettes and a distinct style that permeates through all the designs.


All the pieces in both books can be made with simple stringing, linking and knotting techniques and all the skills you will need are covered in the General Instructions sections at the back of each booklet. This means that both are the perfect choice for beginners or those makers who just struggle for ideas on materials or colour combinations.


Choose from necklaces, bracelets and earrings (left two from Beach Chic Jewelry, right two from Earthy Boho Jewelry)

You can choose to follow the instructions to the letter and use the same supplies as the designer. There is a list of those supplying beads for the designs right at the back of the book and I am sure you could locate the exact same components if you wanted. However, the great thing about the designs in these books is that you can easily adapt them to work with beads and materials you already have in your stash. 
Here are two gorgeous bracelets I made using materials I already had to hand, inspired by the 'Splash of Color Bracelet' and 'Relics Bracelet'. The instructions were really easy to follow and I just picked out beads in similar colours and took inspiration from the relaxed style.


I would definitely recommend these two booklets to newcomers to jewellery making and also for those looking for colour ideas and ways to make more layered and textural pieces. They would make a great and inexpensive addition to your bookshelf.


Beach Chic Jewelry is available from Amazon, priced at £5.99
ISBN 978-1-4647-3525-7

Earthy Boho Jewelry is available from Amazon, priced at £5.99
ISBN 978-1-4647-3524-0

Monday, 6 June 2016

Winner!

Random.org has picked a winner of our Country Garden Earrings Creative Pack from Spellbound Bead Co.

V Reeve - please email us at helen@thebeadinglibrary.com and we'll arrange for your prize to be sent.


Thank you to all who entered.

Look out for our latest giveaway over on our Facebook page!

Thursday, 26 May 2016

Kit Review - Country Garden Earrings from Spellbound Bead Co

Create 25 pairs of floral earrings in time for summer!


Country Garden Earring Creative Pack - Autumnal colour way
When Christine at Spellbound Bead Co asked me to review this creative pack, I will be perfectly honest and tell you that I didn't think I would need the instruction booklet that comes with all the supplies. I've made lots of flowery earrings before, and thought I'd find the designs included far too easy. Boy, was I wrong! I learned lots of new techniques, particularly in creating stems and stamens from wire, and the designs I made from the instructions provided were so much better than those I might have come up with on my own.


Country Garden Earring Creative Pack - Azure colourway
Looking at what comes with the kit — alongside the detailed instruction booklet comes a selection of lucite shapes including leaves and flowers of different types, three sizes of seed beads in a variety of colours, lots of tiny glass trumpet flowers and leaves along with glass pearls, facets, headpins, silver plated wire and enough earring findings to make 25 pairs of earrings. All you need to add are the tools. Just a pair of round nosed pliers, wire cutters and chain nosed pliers should suffice. Oh, and a tape measure if you want to follow the instructions precisely and cut all your headpins and wire lengths exactly to size.


My first piece of advice when starting with this kit echoes that given on the first page of the booklet included. Make sure to read the 'Before You Begin' section that covers all the techniques and materials needed. It will help a lot if you understand all the different lucite shapes too!


If you are new to jewellery making or to the techniques used, then it is definitely a good idea to start with the simpler designs introduced first in the booklet. I should say here that the designs are very sensibly ordered so that you may master simpler skills first before adding in more tricky techniques using wire. I began with the Bluebells earrings and worked my way through the next eight designs before I had a go at earrings further on in the booklet and even having a go at my own designs. Each design has a clear list of the ingredients required and a lovely photograph of the finished earrings so you can check your work easily.
One of the great things about this kit is that none of the earrings take very long to make. You could whip up a pair to match your summer dress at a moment's notice, or quickly create a last minute gift for a friend. Available in Candy (pink, white and blue), Garden (purple, pink and lilac), Azure (blue, green and purple) and Autumnal (black, red and gold), you will find it tricky to choose which colour way to buy. I tested the Azure kit but I now have my eye on the Autumnal pack with its inclusion of reds and bolder colours.
Here are some of my finished earrings displayed on my new flower pot earring stands. Find out how to make the pots here.


The Country Garden Earrings Creative Pack is available from Spellbound Bead Co and is priced at £29.95 which works out at around £1.20 per pair of earrings! 


We have a pack to give away to one lucky winner!
To enter, just leave a comment on this post with your preferred colour way and we will pick a winner at random after midday on Monday 6th June. Which colour will you choose?


Saturday, 14 May 2016

Winner!

Random.org has picked a winner of our How to make Hammered Wire Jewellery book...

Angela Finch - please email us at helen@thebeadinglibrary.com and we'll arrange for your prize to be sent.


Thank you to all who entered.

More giveaways coming soon!

Wednesday, 11 May 2016

Display Inspiration Series:2: Stepping up my jewellery display!

If you make jewellery to sell, how you display it should be just as important to you as the jewellery pieces themselves. I show you just how original and different you can make your retail presence with minimal expense and a little creative thinking.

Pots of ideas!
Whilst being busy with The Beading Library and working hard on newsletter tutorials and other projects behind the scenes, I have also been spending time on my own jewellery business Ring O' Roses - Original Jewellery by Helen Bowen

On a recent trip to Malvern, I cam across a crate of mini terracotta flower pots outside an antique shop. All suitably full of character (read: dirty and battered) and cheap as chips. I picked up ten to begin with before I even knew what I was going to do with them but ended up going back for another five once I'd had some interesting ideas for jewellery stands! 


In my head I had a series of pots with miniature wooden trellis for displaying a new range of flower themed earrings. I'd spotted some cheap terracotta coloured clay in The Works which I though would be perfect for both weighting the pots and securing trelliswork but my first task was to design and make the wooden framework that would allow me to hang earrings. 

I did some initial research and discovered you could actually buy 1:12 scale trellis from numerous dollshouse suppliers but at a couple of pounds a pop, that was going to work out rather costly for fifteen pots so I then looked into making my own...

Balsa wood is a popular material in model building and other craft applications and is easily available on Ebay in all sorts of shapes and sizes. I bought a couple of ten packs of balsa wood strips (3x3mm square) that came in foot long lengths and started with a simple ladder design.


The wonderful thing about balsa wood of this size is that you can simply cut it with a pair of sturdy scissors. I cut strips into side supports around 12cm tall and cut four smaller pieces for each pair, each about 3cm long.


Here they are glued together with PVA and awaiting an application of woodstain (pilfered from my husband's shed) to make them look a little more realistic.


Fun, fan-shaped trellis
Once I was confident using the wood, I ventured into making more complicated designs. These fan-shaped supports are my favourite and are the strongest but obviously they use more wood and are quite time-consuming to make!


Free to collector!
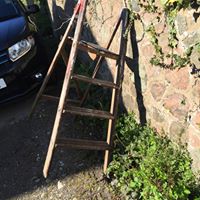
At this point in the proceedings, I came across these medium sized step ladders on a local recycling site - free to a good home! I immediately thought what a great set of shelves they would make for my little pots but as my husband pointed out, I would need to secure the pots somehow if I was going to leave them at the mercy of customers in a retail environment!

Hmmm! This was going to need an engineering solution!


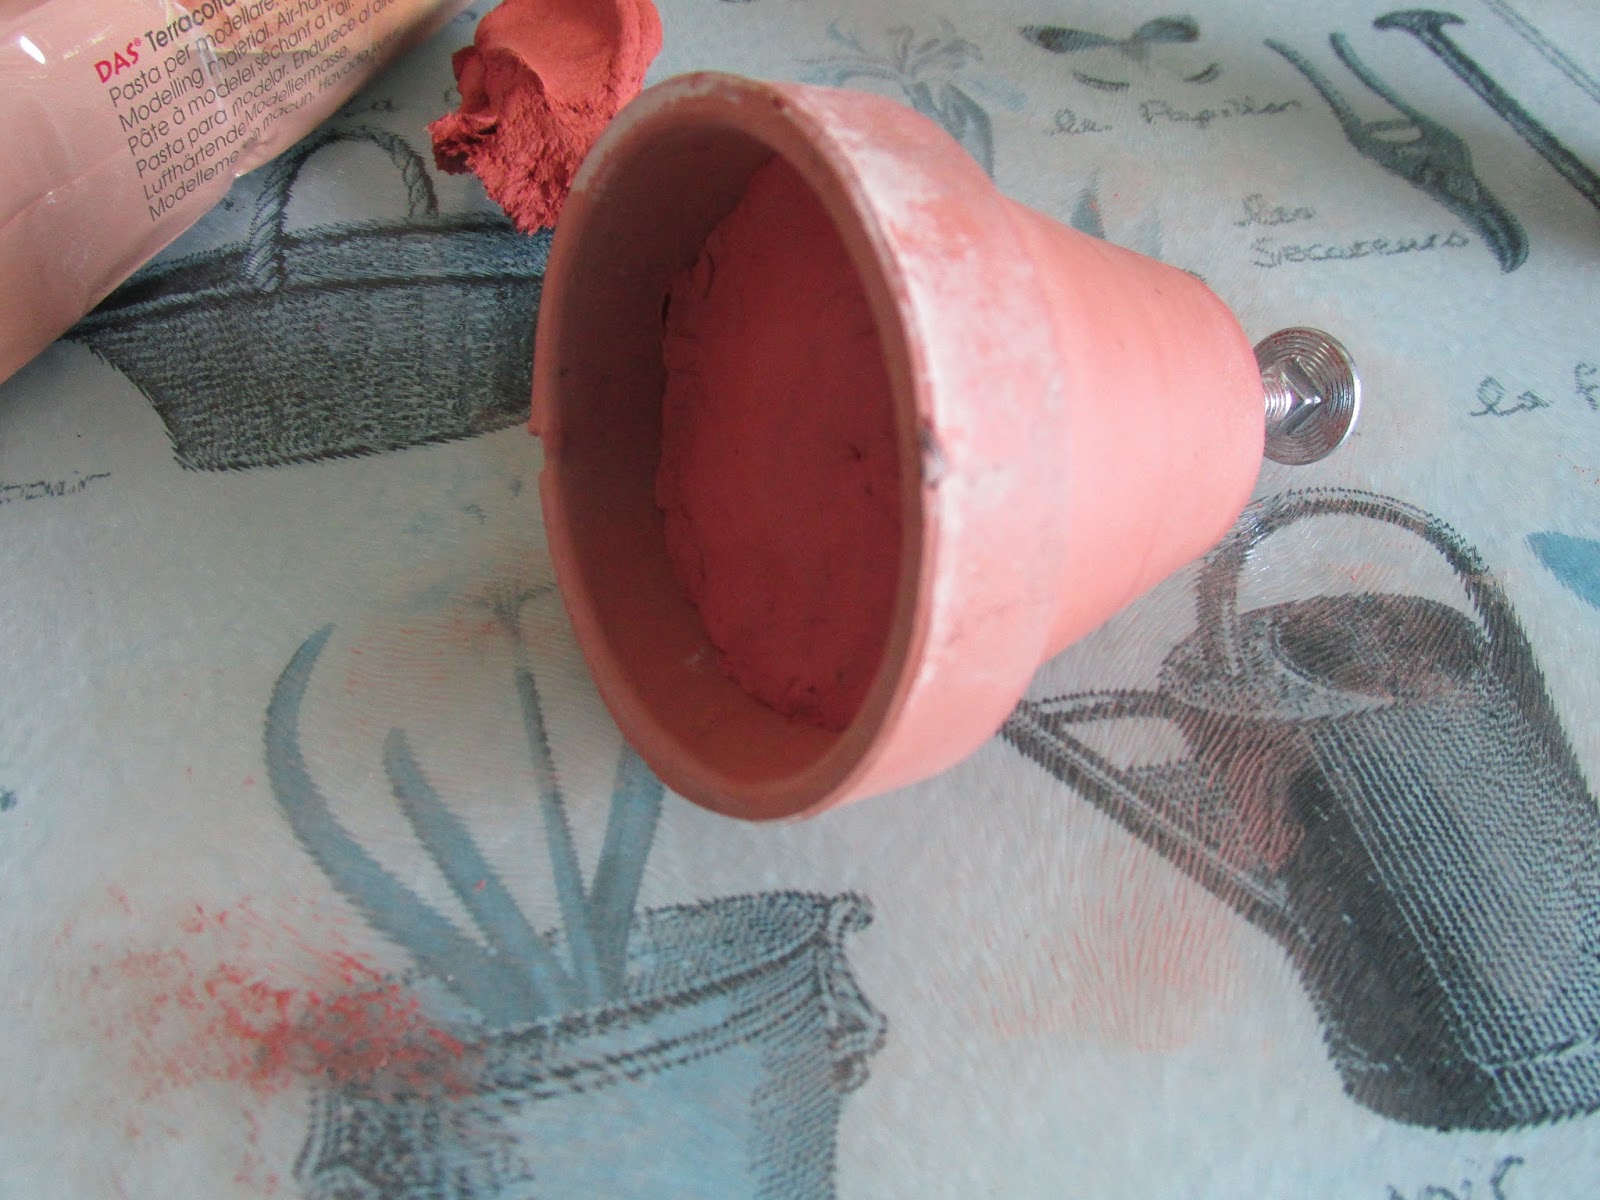
I decided that what I needed were some bolts that I could screw through the steps and into the flower pots (which conveniently all had a single hole in the bottom). However, I also wanted to be able to stand the pots up independent of the ladders if required, so simply embedding a bolt that protruded through the hole in the bottom of the pot, was not going to work. If I filled the pots with clay as I intended to, I wouldn't be able to remove the bolts or access the inside to screw and unscrew a nut.

I spent two days traipsing around DIY and hardware stores in the area, trying to describe to various helpful staff what I wanted. Some 'metal things that I can stick in clay and screw a screw into that aren't rawl plugs and that I can screw and unscrew as I like' didn't seem to exist!

But then I somehow stumbled on the right Google search terms and hey presto! Screwfix's threaded metal inserts were the perfect solution!


I used two part expoxy to glue an insert to a 30mm washer which would stop the insert from shifting around in the pot or, worse still, falling out the hole in the bottom of the pot.
I then glued the washer/insert ensembles into the bottom of the pots and checked the M6 screws I'd bought (50mm long) would screw in and out easily!


It was then time to fill the pots with clay. I screwed in the screws so clay didn't creep down the hollow insert and filled the pots up to the collar with clay. Do you notice the rather appropriately themed workstop saver I used to work the clay? I only just spotted it!


While the clay was still soft, I pushed the trellis supports into it so they were firmly embedded. I also found some rather fun little chalkboard picks at The Works which I trimmed down and stained to match the trellis. I left them all to dry thoroughly.

Once dry, I noticed that the clay had shrunk away from the edges of the pot slightly (clay shrinks by up to 10% apparently when it dries) so I needed a solution to cover the gaps and look a little more soil-like. A trip to Wilkos (yes, it's amazing the things you find in there!) and I was all set with a large bottle of PVA and some bird grit. I spread a good thick layer of PVA over the clay surface and sprinkled on the grit generously. I left to dry and shook off any excess.

My attention turned to the rather sorry looking step ladders that I'd picked up locally. A good sanding down, and a new slat to fill the gap in the top platform helped a lot. Then a coat of woodstain and the addition of my business name in white chalk paint (using a home made stencil!) gave them the right look. I marked holes for the bolts to go through (five on each shelf) and borrowed my husband's drill to make the holes needed. 


And here is the finished display! 

It wouldn't have been out of place at last weekend's RHS Malvern Spring Show.I now need to finish the jewellery collection that will be placed on it and decide where I am going to install it! What do you think?


Friday, 29 April 2016

Book Review - How to make Hammered Wire Jewellery by Linda Jones

We test drive expert wireworker, Linda Jones' latest book.

I own many of Linda's books on wirework and I knew that if these were anything to go by, her new book was going to be full of achievable and wearable designs. I wasn't disappointed. 

Whether you are an experienced wireworker or just starting out in this addictive medium, you will be certain to find some new techniques and ideas amongst the stunning pieces of jewellery in this book. 

And, as is usual for this type of publication, there is a section at the back covering all the basic skills you will need to complete the projects. With nothing more than basic jewellery pliers, a hammer and steel block you too can be creating striking and original pieces with or without beads. 


Divided into four main sections, the projects range from necklaces, links and pendants made using a 'feathering' technique — flattening and spreading wire by stroking with your hammer rather than bashing it, an entire section of shaping wire into freeform 'doodles', another on 'scrunching' wire into frames and focals and finally, a chapter of projects that will inspire you to combine multiple techniques into single pieces.


Classic design using modern techniques
One of my favourite tutorials from the 'Feathers' section is this flower brooch that can also be adapted into a pendant or into a focal on a necklace. One of the great things about this book is that Linda always provides further inspiration for adapting and extending each project. Each idea is beautifully and clearly photographed so you are able to see exactly how to recreate the designs at home.


Learn to wiggle wire into freeform shapes
For a more modern look, why not have a go at a 'Wiggles' necklace from the 'Shapes' chapter which can incorporate your favourite glass or gemstone beads and give you practice in binding wire as well as shaping and hammering.


If you are a regular reader of reviews at The Beading Library, you'll know that we always like to try out a project or two from our books. This time around, I really was spoilt for choice. In the end, I looked at what gauges of wire I had in my  rather chaotic wire drawer and chose a couple of projects to try using 1mm bare copper wire.


'Hoopla Spiral Earrings'
These hoopla spiral earrings are from the 'Get Creative' chapter and were really quick to make. The texturing on the hoops was achieved using a ball pein hammer (the ball end!).


Don't be afraid to combine techniques from more than one project!

I had some gorgeous 8mm Fluorite rounds left over from a previous project so I made a bracelet that combined techniques from a couple of projects in Linda's book — 'Hinged Links' and 'Ring Chain Bracelet'.
I also followed the instructions at the back of the book to make a wire clasp.

I will definitely be trying some of the other designs in this great title and might even see about getting myself one of Linda's Whammer hammers too as it is the perfect tool for flattening wire without marking it. Watch this space!


You can buy 'How to make Hammered Wire Jewellery' from Amazon, priced at £12.08ISBN - 978-1-78221-298-0


We have a copy of this book to give away to one lucky reader! Simply comment on this post and tell us about your adventures in wire! We will pick a winner at random, after midday on Friday 13th May (lucky for some!).

Good luck!


Wednesday, 13 April 2016

Book Review – Knotted Bead Jewellery by Jenny Townley


This new book, written by knotting expert, Jenny Townley, is packed full with more than 25 micro macramé projects for every skill level from beginner to experienced knotter. You will also find more ideas and inspiration on her website www.micromacrame.net


As has become customary for macramé books, there is a comprehensive section at the beginning, covering all the basic knots, tools and techniques required to complete the projects in the book. There is also an essential skills chapter which includes a very useful section on finishing your macramé work (something I always struggle with) and some tips on colour selection.

Before you dive into the projects themselves, you’ll find a visual reference of all the items available to make. Browsing through the contents or the book itself, you will be struck by the range of pieces to make and the beautiful photography, which includes images of the jewellery being worn. 

We particularly liked the ‘Tropical Waves’ bracelet being modelled here but we suggest you don’t start with this project which is in the ‘Advanced’ section of the book. We recommend that even if you are already familiar with macramé techniques, you begin with one of the simpler projects in the ‘Beginner’ or ‘Intermediate’ chapters to accustom yourself with the format of the projects and the specific skills required for the more complex designs.


For those new to macramé, this ‘Cluster of Pearls’ necklace is a wonderful place to start. This particular project uses glass pearl beads but you could use Freshwater Pearls as long as the holes are large enough to pass the macramé thread through. It isn’t macramé per se but learning to tie neat and consistent overhand knots is a skill that you will find useful for all sorts of projects.


For a more intricate design, why not have a go at this rather sweet owl pendant which will give you practice in Double Half Hitch Knots, Right Full Loop Knots as well as easy Lark’s Head and overhand knots.


I always like to have a go at a project in the book I am reviewing and I picked a rather clever design for ‘netting’ a gemstone with macramé cord. I have quite a large collection of seaglass pieces that I collected a few years ago from a beach in Seaham, and I thought this would be perfect for use in this project.

I have to admit that it took me two goes to get the pendant section right for my necklace. The instructions were a little short and lacking in detail (I am not an accomplished knotter!) for this particular 'intermediate' project. 

My own netted seaglass pendant!
However, closer examination of the step images and a bit of experimentation and I was able to get it right. I should also say here that perhaps my only criticism of this book is that sometimes, the layout of step images and instructions can be a bit confusing. It is not consistent throughout the book and this project in particular will see you jumping between pages to follow the steps in the right order!


So, all in all this is a lovely book with modern and wearable designs for all occasions. Whether you like to make full micro macramé pieces or just incorporate some knotted elements into other jewellery, you will learn some useful techniques from these pages.

Knotted Bead Jewellery is available from Amazon, priced at £10.68

ISBN 978-1-78221-390-1


Thursday, 31 March 2016

DVD Review - Making Beaded Tassels & Fringes from Spellbound Bead Co

When I received this DVD through the post from Christine at Spellbound Bead Co, I had to restrain myself from putting it on straight away, especially when a quick glance inside told me that I already had the beads I needed in my stash!


However, I managed to put it away until this Easter when I knew I would be spending a few days in Devon. I packed up my computer and a selection of beads, thread, beading needle and scissors (tassels are the perfect projects for beading on the move!) and as soon as the rain arrived, I dived in!

The first great thing about this DVD is that the accompanying booklet has a list of the supplies you'll need to complete the designs included in the video tutorial. This means you can gather together everything you need before you've even put the DVD into the player. You'll need beads suitable as the focal or tassel top then a selection of smaller beads for the tassel strands. I used a range of size 6/0, 8/0, 10/0 seed beads in shades of purple, pink and grey to complement the beautiful lampwork bead I'd chosen from Ciel Creations plus some lilac bugle beads and Hex beads to add a little sparkle. Instead of the recommended fire-polished faceted beads, I used some Czech glass Cathedral beads.


Julie Ashford takes you through selecting beads at the start of the tutorial, showing you how to pick out colours from your chosen tassel top beads and the right beads to choose for weighting your strands. She then shows, at close quarters how to thread your beads to create a series of identical beaded strands (including some clever little tricks to keep your beads in place and to avoid testy tangles in your thread!). Following Julie's clear and simple instruction, you will quickly work to make your own first tassel. Once you've mastered the easiest design, Julie will take you on to discover more ways to finish your tassel ends and also, how to create textural branched strands. I warn you, you will be hooked!

This DVD doesn't just cover tassels! You will also learn to make pretty fringed necklaces and also how to incorporate tassels with ribbon to create your own beaded trim to use in your home made cushions and throws. PLUS, Julie covers some beautiful beaded beads using a couple of techniques for creating luxurious tassels that you could use as curtain tie backs or other home décor accessories. The sky is the limit once you have learned the techniques.


The instructions and demonstrations in the DVD are so clear and comprehensive, I only needed to watch once to be able to go away and create my own simple tassel. I will certainly be referring back to the video to make the more complex tassels and to have a go at beaded beads in the future. Whether you are a beginner beader or are familiar with small beads, you'll learn something new from Julie.


And if you want even more tassel-tastic fun, then why not get a copy of Julie's book 'Spellbound Beaded Tassels' which will take your new tassel techniques up to the next level.
Both the DVD and the book are available from Spellbound Bead Co. The DVD is just £9.95 and the book is £14.95.


We have a copy of the DVD to give away to one lucky fan!


To be in with a chance of winning, simply comment on this post an tell us your favourite colour combination for a tassel.Look out on our Facebook page for another opportunity to enter!

We'll pick a winner at random after midday on Friday 29th April 2016.

Wednesday, 23 March 2016

Book Review - Fanciful Findings by Holly Witt-Allen

This is more a booklet than a book, but it is still 32 pages full of ideas and inspiration for using unusual objects in your jewellery pieces. In all, there are 22 projects for designs ranging from standalone bracelets to matching necklaces and earrings, all using recycled/upcycled components, or materials that look like they are!


Those who like to take a mixed media approach to jewellery making will love the techniques used in this book. 
Corks, clocks and cogs
You will have opportunities to use rubber stamps, découpage and dimensional finishes in some of the pieces alongside more conventional knotting and linking techniques. Whilst some projects will require you to search out unusual components such as hex nuts or hinges, others can be made using items you’d easily find at home including ring pulls from fizzy drink cans, bottle tops and corks. 


Stamps and sweetie tins
In addition to these ‘found objects’, you’ll also find ideas for using pseudo second-hand components often found online at scrapbooking and papercraft suppliers. Tim Holtz Ideology® range is a particular collection that springs to mind. With the addition of metal patinas, paint or paper, Holly will show you how to transform run-of-the-mill supplies into unique components and quirky designs. I particularly like the necklaces made from sweetie tins and simple stamping techniques.

The projects are beautifully photographed and the instructions have accompanying images to make them as clear as possible. You’ll also find a reference at the back of the book, explaining all the jewellery techniques required which helps to keep the project instructions as uncluttered as possible.

My only slight criticism of this book is that the materials lists for projects are rather long — you could find yourself searching for a while for some of the specific components. However, try substituting some of the supplies with similar products you have in your stash for a similar overall effect and don’t be afraid to mix ideas from different projects to suit the supplies you already have to hand.


Here’s a variation on the cork bracelet I made using a Prosecco cork and a Rioja cork from the collection I keep in a pot (they come in handy for all sorts of things!). The 'Leap' connector is made using a J-Lynn Jewels decoupage disc. The watch faces are from a job lot I bought on Ebay a while ago, simply stuck to cork slices. The pretend typewriter keys are made using clock charms with domed stickers adhered to them (the stickers came from Home Bargains discount store!). The cogs are from Big Bead Little Bead and the verdigris patina padlock charm and donut bead are from the range of Greek Metal components at Smitten Beads, as is the flower cog bead.  I don't remember where I found the little keys or clasp but I'm sure you can find similar online. And btw - the secret to turning cork slices into connectors? Tiny brass picture loops which simply screw in!


We have a copy of this book to give away


To enter into the draw to win, simply comment on this post and tell us the most unusual component or technique you’ve used in a jewellery piece. Look out on our Facebook page for a second chance to comment and win!

We will pick a winner at random on Monday 4th April after midday and announce on our Facebook page.


Fanciful Findings is published by Leisure Arts Inc. and is available from Amazon, priced at £7.00

ISBN 978-1-4647-3352-9